
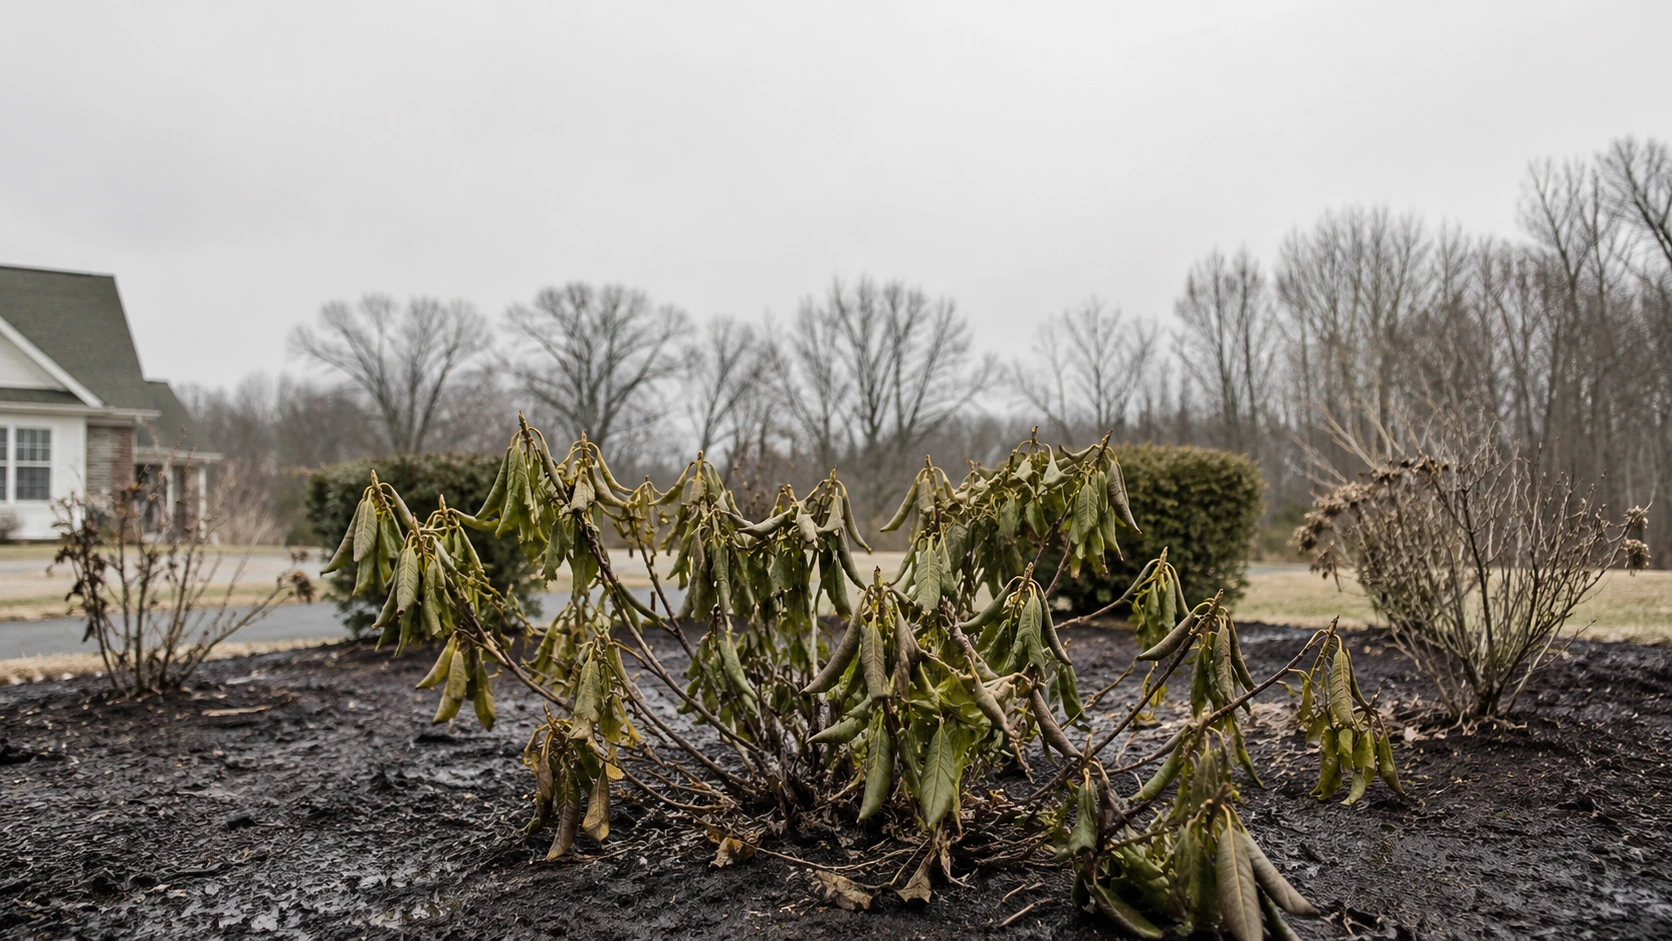
A dying rhododendron is typically suffering from Phytophthora root rot, suffocating in poorly draining clay soil, or struggling with a soil pH above 6.0. If the leaves are curling downward and turning brown but refusing to drop off the branches, the root system is failing. Saving the plant requires immediate moisture management, pruning of diseased wood, and targeted fungicidal soil drenches.
Identification Guide
You need to inspect the foliage and the main stems immediately to determine how far the decline has progressed.
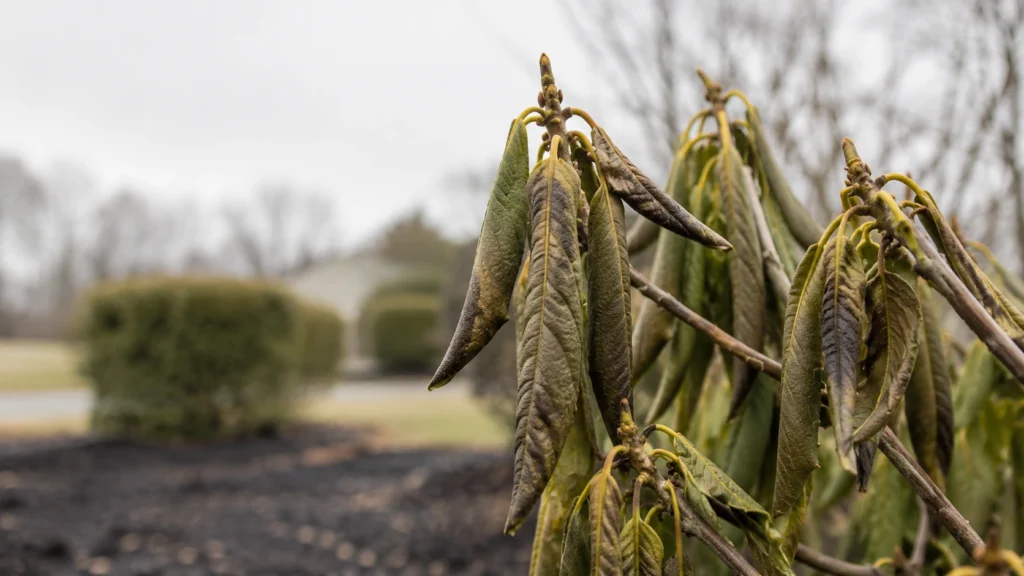
- Curled and Drooping Leaves: The foliage rolls inward and hangs straight down. This happens because failing roots cannot uptake water, mimicking drought stress even in wet soil.
- Color Fading: Healthy dark green leaves transition to a sickly pale yellow-green before turning entirely brown.
- Persistent Dead Foliage: Unlike normal seasonal shedding, a diseased rhododendron holds onto its dead, brown leaves tightly against the stems.
- Stem Discoloration: Scrape the bark near the soil line with your thumbnail. Healthy tissue underneath is pale green. Dark brown or reddish-black tissue indicates active rot moving up the plant.
- Foul Soil Odor: Dig 3 inches into the root zone. A sour, swampy smell confirms anaerobic conditions.
I frequently walk onto properties where the client has been heavily watering a drooping rhododendron, assuming it is dehydrated. In reality, they are drowning a plant that is already struggling with root rot.
Root Causes
Rhododendrons have extremely shallow, fibrous root systems that require highly acidic soil (pH 4.5 to 5.5) and excellent drainage. Plant decline almost always starts below ground.
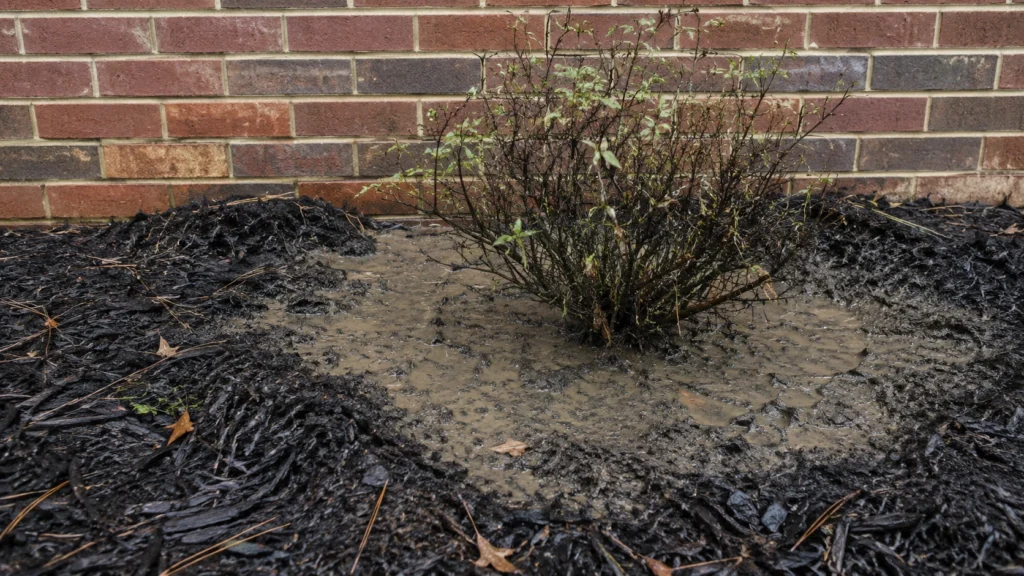
Heavy clay soils trap water around the root ball. This standing water creates an anaerobic environment that suffocates the roots and acts as a perfect breeding ground for Phytophthora, a highly destructive water mold pathogen. The roots rot away, cutting off moisture and nutrient delivery to the upper canopy.
Improper planting depth is another massive contributor. Burying the root flare under 4 inches of topsoil and heavy hardwood mulch starves the plant of oxygen. Furthermore, planting near concrete foundations often leaches lime into the surrounding soil, driving the pH well above 6.0. High pH locks up iron, causing chlorosis that weakens the shrub over time.
In my years working the humid coastal states, I have pulled hundreds of dead rhododendrons out of the ground. The root balls are almost always soaking wet, black, and completely detached from the native soil.
Step-by-Step Solution
Saving a declining rhododendron requires stopping the rot and modifying the soil environment simultaneously. You cannot spray your way out of a drainage problem.
- Pull Back the MulchRake away all mulch, pine needles, and debris within 3 feet of the main trunk. Expose the bare soil to allow trapped moisture to evaporate. Do not apply fresh mulch until the plant stabilizes.
- Test and Adjust Soil pHUse a soil probe to check the pH. If it registers above 6.0, apply Espoma Soil Acidifier (elemental sulfur). Spread 1.2 lbs per 10 sq ft of root zone to slowly lower the pH. Do not use aluminum sulfate, as rhododendrons are highly sensitive to aluminum toxicity.
- Prune the Diseased WoodCut away dead, brown, or blackened branches using bypassed pruners. Cut at least 4 inches below the visible damage into healthy, green wood. Sanitize your blades with a 10% bleach solution between every single cut to avoid spreading the pathogen.
- Apply a Fungicidal Soil DrenchTreat the root zone with a systemic fungicide containing Phosphorous acid or Fosetyl-Al, such as Monterey Agri-Fos. Mix 0.5 fl oz per gallon of water. Pour 1 to 2 gallons of the mixture directly over the root zone, ensuring it soaks down 6 inches into the soil.
- Adjust the Irrigation ScheduleTurn off the sprinkler zone hitting this landscape bed. Only water manually with a hose if the top 3 inches of soil become completely bone dry.
A major mistake property owners make is hitting a stressed, dying plant with heavy nitrogen fertilizer hoping to “green it up.” This forces the compromised root system to push new growth it cannot sustain, accelerating plant death. Expect recovery to be slow. If the drench and pruning work, you will see new buds pushing out in 4 to 6 weeks.
Professional vs. DIY
Treating a single, small shrub is highly manageable on your own. However, widespread decline across a mature, expensive landscape hedge changes the equation.
| Factor | DIY | Professional |
| Cost | $$ | $$$$ |
| Speed | Weeks | Days |
| Effectiveness | Moderate | High |
| Risk | Moderate | Low |
Fungicides available at hardware stores are often preventative rather than curative. Licensed technicians carry commercial-grade systemic products like Subdue Maxx (Mefenoxam), which aggressively stops Phytophthora root rot in its tracks. A pro will also accurately diagnose whether you are fighting an aggressive soil pathogen or simply dealing with an irrigation leak. If your rhododendron is over 6 feet tall or holds significant landscape value, skip the DIY chemicals and call a certified arborist or landscape professional immediately.
Common Misdiagnosis
Many property owners mistake winter burn for an active disease or pest infestation. During deep freezes, high winds strip moisture from the evergreen leaves while the frozen ground prevents the roots from drawing up replacement water.
Winter burn presents as distinct brown, scorched edges on the tips and margins of the leaves, while the center of the leaf often remains green. The damage is heavily concentrated on the side of the plant facing the prevailing winter winds.
In contrast, root rot and botryosphaeria dieback cause entire leaves and whole branches to collapse, turn solid brown, and die uniformly. I frequently tell clients: if only the leaf edges look torched but the branches are solid, leave it alone. The plant will shed the damaged leaves and push new growth by late spring.
Prevention Tips
Creating a permanent, hospitable environment is the only way to keep these plants thriving long-term.
Always plant rhododendrons slightly “proud” of the soil grade. The top of the root ball should sit 1 to 2 inches above the surrounding native soil level. Mound a high-quality mix of topsoil and peat moss up to the root flare, ensuring water naturally runs away from the main trunk.
Avoid planting under downspouts or in the low spots of your yard. Apply a strict 2-inch maximum layer of pine bark or pine needle mulch, keeping it completely off the bark of the main stems. Pine needles naturally break down to add slight acidity to the soil. Stop automatic irrigation systems from hitting established rhododendrons daily; deep, infrequent watering builds resilient root systems.
People Also Ask
My rhododendron is drooping. Should I water it more?
Usually the opposite. Curled, drooping leaves happen because failing roots cannot take up water, and that mimics drought stress even when the soil is wet. Before watering, dig 3 inches into the root zone. If it smells sour or swampy, or the soil is already saturated, more water will finish the plant off. Check the drainage first, not the hose.
What soil pH does a rhododendron need?
Between 4.5 and 5.5, which is strongly acidic. Above 6.0 the plant starts locking up iron and yellowing. Rhododendrons planted near concrete foundations drift alkaline over time because lime leaches out of the concrete into the surrounding soil, so test the pH there specifically rather than assuming it matches the rest of the yard.
Can a rhododendron recover once the leaves turn brown and stay on?
It depends on how far the rot has travelled. Scrape the bark near the soil line with your thumbnail. Pale green tissue underneath means the stem is still alive and the plant is worth saving. Dark brown or reddish-black tissue means the rot has already moved up out of the roots, and at that point recovery is unlikely.
What to Read Next
As we’ve established, poor soil drainage is the silent killer of foundation plants across the country. If your landscape beds are constantly pooling water after heavy storms, you are breeding root rot pathogens. Fixing the underlying grade is mandatory, which is why learning how to drain standing water from your yard before installing expensive new shrubs will save you thousands of dollars.